Professional pressure washing services and more across Long Island.
Contact Info
- Roslyn Heights, NY 11577
- Call: 516-353-8711
- Text: 516-353-8711
- 24/7 - 365 Days
Professional pressure washing services and more across Long Island.
Contact Info
Your patio pavers face brutal Long Island winters and humid summers. Learn how professional cleaning and sealing prevents cracks, restores color, and stops weeds before they compromise your investment.

Nassau County sits in a perfect storm of conditions that accelerate paver damage. You’ve got coastal salt air drifting inland. Humid summers that promote organic growth. And winters that cycle between freezing and thawing dozens of times.
Each freeze-thaw cycle is an attack on your pavers. Water seeps into the porous surface, freezes overnight, and expands with tremendous force—up to 25,000 PSI. That pressure creates microscopic cracks that grow larger with every cycle. Over a few seasons, you end up with visible damage, uneven surfaces, and pavers that need replacement.
Paver cleaning and sealing Long Island properties isn’t just cosmetic. It’s structural protection. A properly sealed surface repels water instead of absorbing it, which means freeze-thaw cycles can’t do their damage from the inside out.

Let’s get specific about what’s happening to your patio cleaning in Plainview right now. During the day, temperatures climb and pavers absorb moisture from rain, humidity, or melting snow. At night, temperatures drop below freezing and that trapped water turns to ice.
Ice takes up about 9% more space than liquid water. In the confined space of a paver’s pores, that expansion creates internal pressure that causes cracking. It’s not one dramatic event—it’s cumulative damage from 20, 30, or 40 freeze-thaw cycles each winter.
Spring arrives and you notice the results. Pavers that were flush last fall now sit unevenly. Hairline cracks have appeared. The joints between stones have widened as pavers shifted during ground movement. And because those joints are now open, weed seeds blow in and take root in the loose sand.
The coastal influence adds another layer. Salt air doesn’t just affect metal—it accelerates the breakdown of paver surfaces and any existing sealers that weren’t designed for marine environments. Combined with Long Island’s humidity, you get the perfect conditions for algae, mold, and mildew to colonize the surface.
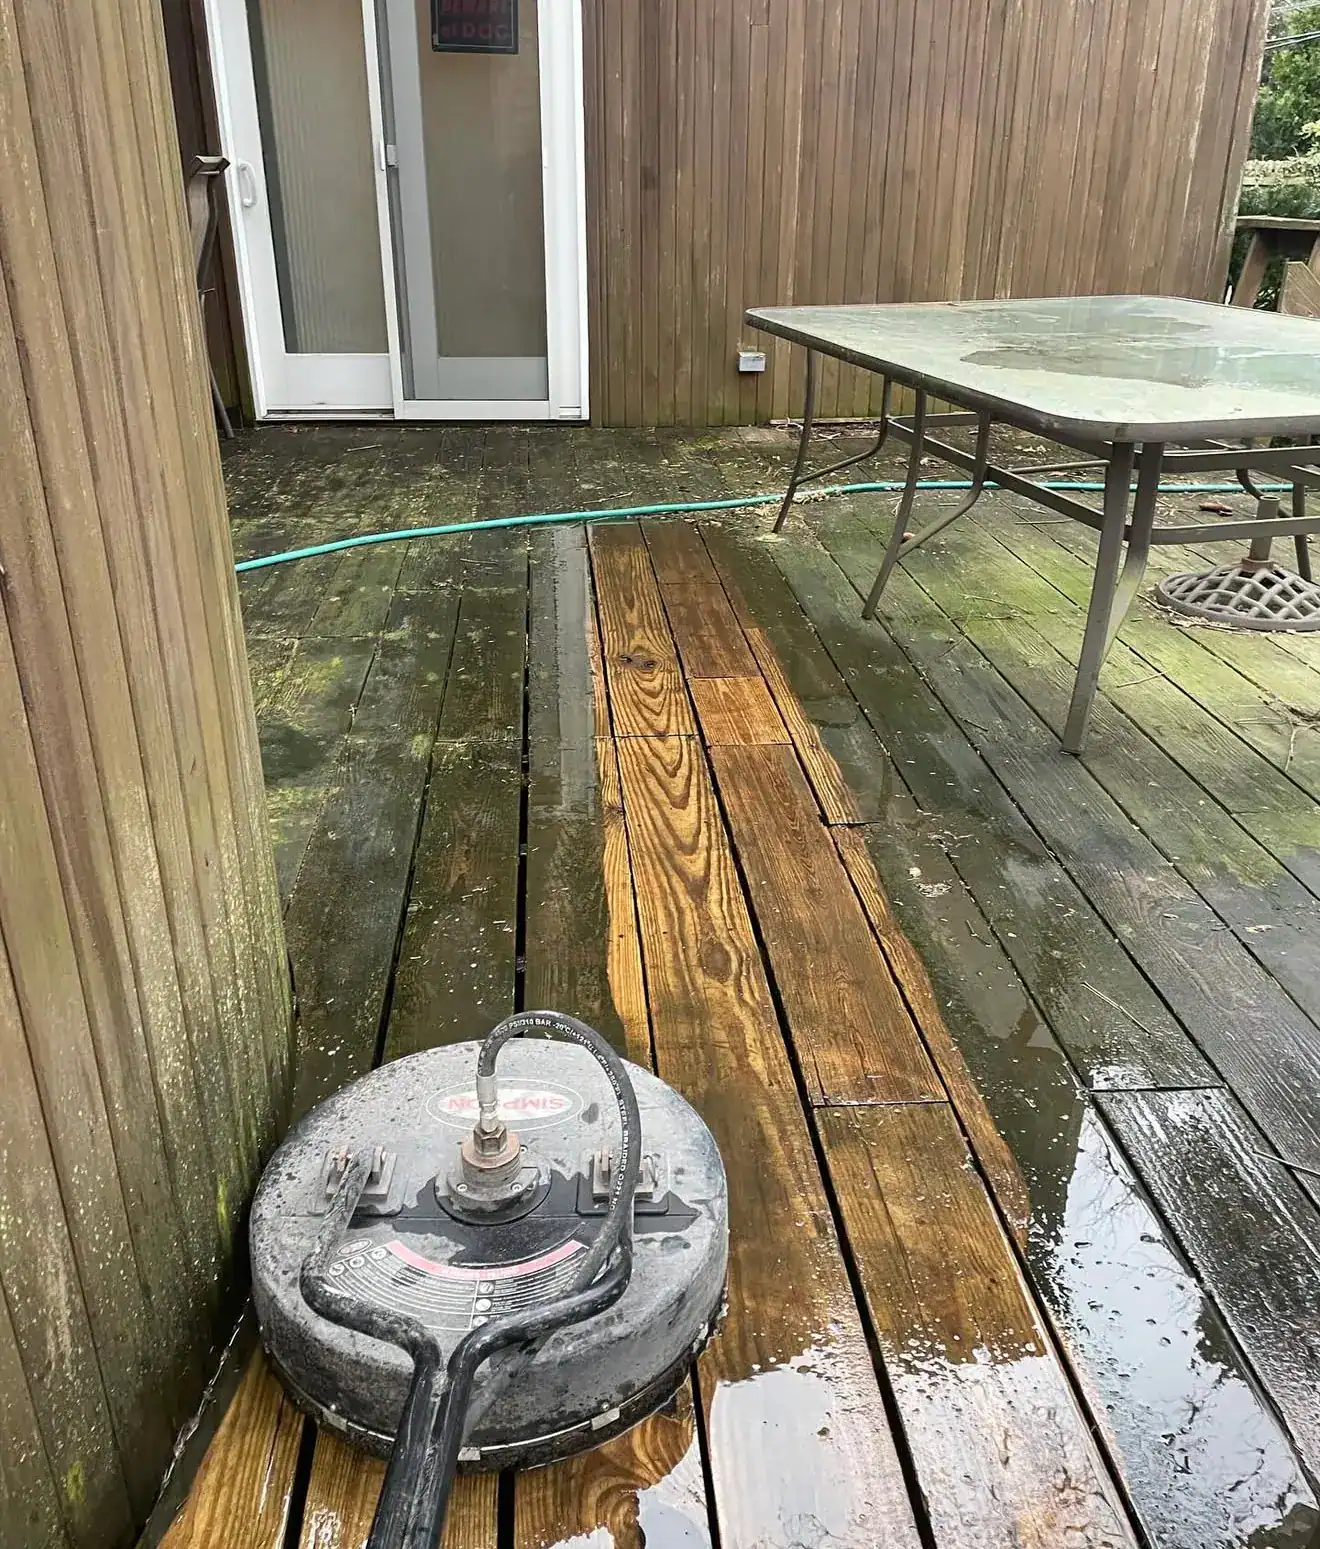
Professional patio paver cleaning removes years of this accumulated damage. But cleaning alone isn’t enough. Without sealing, the surface is immediately vulnerable again. That’s why the two services work together—cleaning prepares the surface, and sealing protects it going forward.
Think of it like painting a house. You wouldn’t skip the primer and go straight to topcoat. Same principle here. The cleaning phase strips away everything that would prevent proper sealer adhesion. That includes dirt, organic growth, old failed sealer, and efflorescence—that white, chalky residue that appears when moisture pulls salts to the surface.
Once the surface is properly prepared, professional-grade sealer penetrates the paver and creates a barrier. Water beads up and rolls off instead of soaking in. UV inhibitors prevent color fading. And the sealer hardens the joint sand to a mortar-like consistency that stops weeds and prevents sand washout.
Let’s be clear about what “skipping maintenance” actually costs. It’s not just aesthetics, though faded, stained pavers certainly hurt your home’s curb appeal. The real cost is structural.
Unsealed pavers absorb water continuously. That water doesn’t just sit there—it moves through the paver, into the joint sand, and down to the base layer. In summer, this promotes weed growth as seeds find purchase in damp sand. In winter, it creates the freeze-thaw damage we talked about earlier.
But there’s more. As water infiltrates the base layer, it can wash away the fine particles that keep everything stable. You end up with voids under the pavers. Those voids cause settling, which creates the uneven surfaces that become trip hazards. Some pavers sink. Others tilt. The entire installation loses its structural integrity.
Weeds aren’t just ugly—they’re destructive. As roots grow, they push pavers apart and compromise the joint sand that keeps everything locked in place. The more the joints open up, the more sand washes out during rain. The more sand that washes out, the more the pavers can shift. It’s a cycle that accelerates over time.
Oil stains, rust, and organic staining penetrate deep into unsealed pavers. Once they’re in there, they’re permanent. You can’t pressure wash them out because the stain has bonded with the porous material. The only fix is replacing the affected pavers.
Here’s what most homeowners don’t realize until it’s too late: catching these problems early costs a fraction of what you’ll spend on repairs or replacement. Paver restoration services can address minor damage before it becomes major. But if you wait until pavers are cracked, severely settled, or have extensive staining, you’re looking at a much bigger project.
Professional cleaning and sealing every 2-3 years keeps you ahead of the damage curve. It’s not an expense—it’s insurance for an investment you’ve already made. The alternative is watching your patio deteriorate until the only option left is tearing it out and starting over.
And that’s not a small project. Full paver replacement involves removing the old installation, addressing any base issues, and installing new materials. You’re looking at significantly higher costs than maintenance would have been. Plus the disruption to your property and the loss of the original pavers you paid for in the first place.
Want live answers?
Connect with a CPR Power Washing expert for fast, friendly support.
Professional paver restoration isn’t just pressure washing and spraying sealer. There’s a specific process that determines whether the work lasts three years or three months.
It starts with assessment. We examine the current condition—checking for structural issues, drainage problems, and the extent of staining or damage. This step identifies what needs to be addressed before any cleaning begins.
Then comes deep cleaning. High-powered surface cleaners and hot water systems remove years of accumulated grime, oil stains, organic growth, and old failed sealer. For stubborn stains or efflorescence, specialized treatments break down the deposits so they can be flushed away. The goal is a completely clean surface that’s ready for the next steps.

After cleaning, the joints between pavers need attention. Regular sand washes out after a few heavy rains. It offers no resistance to weed growth. And it doesn’t help stabilize the pavers against shifting.
Polymeric sand changes that equation completely. It’s a blend of fine sand and polymer additives. When you sweep it into the joints and activate it with water, those polymers bind the sand particles together into a solid, flexible mass.
Think of it as grout for your patio—except it’s engineered specifically for outdoor conditions. It stays flexible enough to handle the expansion and contraction that comes with temperature changes. But it’s hard enough that weed seeds can’t penetrate and roots can’t push through.
The application process requires precision. The joints need to be at the right depth—typically 1/8 inch below the paver surface. Too shallow and the sand doesn’t lock properly. Too deep and you waste material without gaining stability. Once the polymeric sand is in place and properly activated, it needs time to cure. Usually 24-48 hours depending on conditions.
During that curing period, the polymers are forming bonds that will last for years. When it’s done right, you get joints that resist washout, prevent weed growth, and keep pavers locked in position. This is especially important in Long Island’s climate where freeze-thaw cycles try to shift everything around.
Many DIY attempts fail at this stage. Home improvement store polymeric sand often doesn’t perform like professional-grade products. And without experience, it’s easy to over-water or under-water during activation, which compromises the final result. You end up with hazy pavers or sand that doesn’t harden properly.
Professional installation uses commercial-grade polymeric sand from manufacturers like Alliance Gator—products that are specifically backed by major paver companies like Nicolock and Cambridge. These aren’t consumer-grade materials. They’re formulated for contractor use and tested in real-world conditions.
Once the pavers are clean and the joints are stabilized with polymeric sand, sealing is the final layer of protection. But not all sealers are created equal, and application technique matters as much as product quality.
Professional-grade sealers penetrate the paver surface and create a protective barrier. Water-based sealers are typically recommended for Long Island because they’re breathable—they let moisture vapor escape while blocking liquid water from entering. This is critical in humid climates where trapped moisture can cause problems.
The sealer does several things simultaneously. It hardens the polymeric sand even further, locking it in place. It creates a surface that repels oil, grease, and other staining agents. It includes UV inhibitors that prevent the color-fading that comes from constant sun exposure. And it makes the entire surface easier to clean going forward.
Application requires the right conditions. Pavers need to be completely dry. Temperature and humidity need to be within the product’s specifications. And the sealer needs to be applied evenly without pooling or leaving thin spots. Too much sealer creates a glossy, unnatural look and can lead to hazing. Too little doesn’t provide adequate protection.
Most professional sealers last 3-5 years in Long Island’s climate. That’s significantly longer than the 6-12 months you’d get from DIY products. The difference comes down to formulation and application. Professional products are designed to withstand harsh conditions, and experienced contractors know how to apply them for maximum longevity.
Here’s what sealed pavers look like in practice. Water beads up and runs off instead of soaking in. Spills from outdoor dining can be wiped away without leaving permanent stains. The color stays vibrant instead of fading to gray. And when you do need to clean the surface, a simple hosing is usually enough—no intensive scrubbing required.
The investment in professional driveway paver sealing typically runs $1.50-$3.25 per square foot, including all the preparation work. That covers cleaning, joint stabilization, and sealing. Compare that to the cost of replacing damaged pavers or doing a full reinstallation, and the math is straightforward.
But beyond the financial calculation, there’s the practical reality of how you use your outdoor space. A well-maintained patio is a place you actually want to spend time. You’re not embarrassed when guests come over. You’re not worried about trip hazards. And you’re not spending your weekends pulling weeds or trying to clean stains that won’t come out.
Your patio cleaning in Rosyln represents a significant investment in your property. They create outdoor living space, boost curb appeal, and add value to your home. But Long Island’s climate is working against that investment every single day.
Freeze-thaw cycles, coastal moisture, UV exposure, and organic growth all contribute to deterioration that only accelerates over time. Professional paver cleaning and sealing breaks that cycle. It removes existing damage, restores the original appearance, and creates a protective barrier against future problems.
The process works because it addresses the root causes—not just the surface symptoms. Deep cleaning removes contaminants. Polymeric sand stabilizes the structure. Professional sealing blocks water infiltration and prevents the damage that comes from moisture, staining, and UV exposure. When you need experienced paver restoration services that understand Nassau County’s unique challenges, we bring the equipment, products, and expertise to protect your outdoor investment for years to come.
Summary:
Share: